

Installation guide
How to install Magento MCP Server (community)
In Claude, ChatGPT, Gemini, Microsoft Copilot, Perplexity, Cursor and Claude Code, with what to check before you start and the first prompts to run.
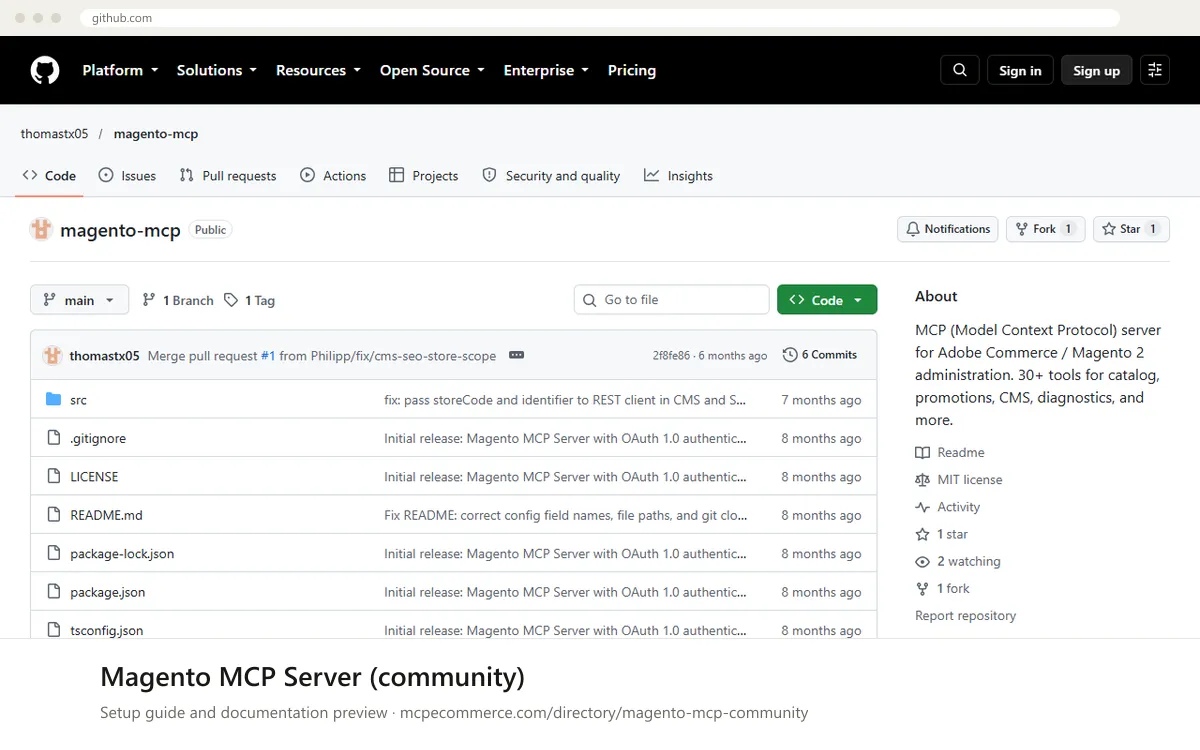
This is a community-built, local MCP server. You clone the repository, build it with Node.js, and register it in your MCP client as a `node` command. It talks to the Magento 2 REST admin API using the four OAuth 1.0 credentials of a Magento integration, passed as environment variables. There is no hosted URL and no vendor support.
A Magento admin or a developer with access to `System > Integrations` should do this, ideally against a staging store first. Create a dedicated integration and tick only read-only API resources at the start. Magento ACL limits what the server can do, so write tools such as bulk price, CMS and SEO updates will fail if the integration lacks those permissions. Enable write resources only for supervised tasks.
Before you start
Node.js18 or newer, plusgitandnpmon the machine that will run the server- A Magento 2 / Adobe Commerce instance (use staging first) and its base URL for
MAGENTO_BASE_URL - Magento Admin access to create and activate an integration under
System > Integrations - The four OAuth credentials from that integration: Consumer Key, Consumer Secret, Access Token, Access Token Secret
- Optional:
FASTLY_SERVICE_IDandFASTLY_API_TOKENif you want targeted Fastly cache purges
- How it runs
- Local, runs on your machine
- Access
- Read and write
- Server address
- Copy it from the vendor documentation
 Magento MCP Server (community) in Claude
- Clone and build the server:
git clone https://github.com/thomastx05/magento-mcp.git, thencd magento-mcp,npm install,npm run build. - In Magento Admin, open
System > Integrations > Add New Integration, name it (for exampleMCP Server), and underAPIselect only the read resources you need. Save, then Activate, and copy the four OAuth credentials. - Open your Claude Desktop config file
claude_desktop_config.json(via Settings > Developer > Edit Config in the desktop app). - Add the
magento-mcpentry from the snippet, replacing the path todist/index.jswith the absolute path on your machine and filling in the fiveMAGENTO_*values. - Fully quit and restart Claude Desktop. The docs cover the desktop config file only; the Claude.ai web connector UI takes remote URLs and cannot run this local server.
- In a new chat, ask the assistant to run
auth.loginfirst, then try a read-only tool.
{
"mcpServers": {
"magento-mcp": {
"command": "node",
"args": [
"/path/to/magento-mcp/dist/index.js"
],
"env": {
"MAGENTO_BASE_URL": "https://your-magento-instance.com",
"MAGENTO_OAUTH_CONSUMER_KEY": "<YOUR_CONSUMER_KEY>",
"MAGENTO_OAUTH_CONSUMER_SECRET": "<YOUR_CONSUMER_SECRET>",
"MAGENTO_OAUTH_TOKEN": "<YOUR_ACCESS_TOKEN>",
"MAGENTO_OAUTH_TOKEN_SECRET": "<YOUR_ACCESS_TOKEN_SECRET>"
}
}
}
} Magento MCP Server (community) in ChatGPT
- The documentation does not cover ChatGPT. This server runs over stdio on your machine and has no URL.
- ChatGPT connectors (Developer mode, custom MCP) add servers by remote URL, so this server cannot be added directly.
- If you must use ChatGPT, you would need to host it behind a stdio-to-
HTTPbridge that you build and secure yourself. That is outside the vendor docs and not recommended for a store admin API. - For a supported path, use Claude Desktop, Cursor, Claude Code or VS Code with the local command from the other guides.
- Never expose the OAuth credentials through a public endpoint.
 Magento MCP Server (community) in Gemini
- Clone and build the server:
git clone https://github.com/thomastx05/magento-mcp.git,cd magento-mcp,npm install,npm run build. - Create and activate a Magento integration under
System > Integrationswith read-only API resources, and copy the four OAuth credentials. - The docs do not cover Gemini. Use Gemini CLI's standard method: add an entry under
mcpServersin its settingsJSONfile. - Paste the snippet, replacing the path to
dist/index.jsand the credential placeholders. - Restart Gemini CLI and check that
magento-mcpis listed with its tools, then runauth.login. - Gemini app extensions generally need a remote URL, so they are not suitable for this local server.
{
"mcpServers": {
"magento-mcp": {
"command": "node",
"args": [
"/path/to/magento-mcp/dist/index.js"
],
"env": {
"MAGENTO_BASE_URL": "https://your-magento-instance.com",
"MAGENTO_OAUTH_CONSUMER_KEY": "<YOUR_CONSUMER_KEY>",
"MAGENTO_OAUTH_CONSUMER_SECRET": "<YOUR_CONSUMER_SECRET>",
"MAGENTO_OAUTH_TOKEN": "<YOUR_ACCESS_TOKEN>",
"MAGENTO_OAUTH_TOKEN_SECRET": "<YOUR_ACCESS_TOKEN_SECRET>"
}
}
}
} Magento MCP Server (community) in Microsoft Copilot
- Clone and build the server:
git clone https://github.com/thomastx05/magento-mcp.git,cd magento-mcp,npm install,npm run build. - The docs do not cover Copilot. For GitHub Copilot in VS Code, create
.vscode/mcp.jsonin your workspace, which uses a top-levelserversobject. - Paste the snippet, replacing the path to
dist/index.jsand the placeholders. Keep real credentials out of version control, for example by not committing this file. - Open the file in VS Code and start the server from the inline control, then enable its tools in Copilot Chat agent mode.
- Microsoft Copilot Studio expects a remote MCP endpoint, so it cannot use this local server directly.
{
"servers": {
"magento-mcp": {
"command": "node",
"args": [
"/path/to/magento-mcp/dist/index.js"
],
"env": {
"MAGENTO_BASE_URL": "https://your-magento-instance.com",
"MAGENTO_OAUTH_CONSUMER_KEY": "<YOUR_CONSUMER_KEY>",
"MAGENTO_OAUTH_CONSUMER_SECRET": "<YOUR_CONSUMER_SECRET>",
"MAGENTO_OAUTH_TOKEN": "<YOUR_ACCESS_TOKEN>",
"MAGENTO_OAUTH_TOKEN_SECRET": "<YOUR_ACCESS_TOKEN_SECRET>"
}
}
}
} Magento MCP Server (community) in Perplexity
- The documentation does not cover Perplexity.
- Clone and build the server first:
git clone https://github.com/thomastx05/magento-mcp.git,cd magento-mcp,npm install,npm run build. - In the Perplexity desktop app, open the connectors settings and look for the option to add a local MCP server by command, if your version offers it.
- If it does, enter
nodeas the command, the absolute path todist/index.jsas the argument, and the fiveMAGENTO_*variables as environment values (see the Claude Desktop snippet for names). - If your version only accepts a remote URL, this server cannot be added, since it has no hosted endpoint.
 Magento MCP Server (community) in Cursor
- Clone and build the server:
git clone https://github.com/thomastx05/magento-mcp.git,cd magento-mcp,npm install,npm run build. - Create and activate a Magento integration under
System > Integrationswith read-only API resources, and copy the four OAuth credentials. - Open Cursor's MCP settings and edit the MCP
JSONconfig (project or global). TheREADMEnames Cursor as a compatible client but gives no Cursor-specific path. - Add the
magento-mcpentry from the snippet with your absolute path and credentials. - Save, then confirm the server shows as enabled in Cursor's MCP settings. Ask the agent to run
auth.loginfirst.
{
  "mcpServers": {
    "magento-mcp": {
      "command": "node",
      "args": [
        "/path/to/magento-mcp/dist/index.js"
      ],
      "env": {
        "MAGENTO_BASE_URL": "https://your-magento-instance.com",
        "MAGENTO_OAUTH_CONSUMER_KEY": "<YOUR_CONSUMER_KEY>",
        "MAGENTO_OAUTH_CONSUMER_SECRET": "<YOUR_CONSUMER_SECRET>",
        "MAGENTO_OAUTH_TOKEN": "<YOUR_ACCESS_TOKEN>",
        "MAGENTO_OAUTH_TOKEN_SECRET": "<YOUR_ACCESS_TOKEN_SECRET>"
      }
    }
  }
}
Magento MCP Server (community) in Claude Code
- Clone and build the server:
git clone https://github.com/thomastx05/magento-mcp.git,cd magento-mcp,npm install,npm run build. - Create and activate a Magento integration under
System > Integrationswith read-only API resources, and copy the four OAuth credentials. - Register the local server with
claude mcp add magento-mcp -- node /path/to/magento-mcp/dist/index.js, using the absolute path to your build. - The server needs
MAGENTO_BASE_URL,MAGENTO_OAUTH_CONSUMER_KEY,MAGENTO_OAUTH_CONSUMER_SECRET,MAGENTO_OAUTH_TOKENandMAGENTO_OAUTH_TOKEN_SECRET. TheREADMEdoes not show the Claude Code syntax for these, so checkclaude mcp add --helpfor how to pass environment variables. - Run
claude mcp listto confirm the server is registered, start a session and ask it to runauth.loginfirst.
Check that it works
Start with questions that only read data. If these answer from your real account, the connection is good.
- Run auth.login, then auth.whoami, and tell me which Magento integration and scope you are connected to.
- List the websites, stores and store views using scope.list_websites_stores. Do not change any default.
- Search for 5 products with catalog.search_products and show their SKU, name and status. Do not make any updates.
Troubleshooting
+The client does not list magento-mcp or shows it as failed to start. What should I check?
Confirm `npm run build` completed and that `dist/index.js` exists at the exact absolute path in your config. Check that `node` is version 18 or newer and on the PATH the client uses. On Windows, the README example uses a path like `C:/path/to/magento-mcp/dist/index.js`. Restart the client after editing the config.
+auth.login or a tool call fails with an authorization or 401 error. What is wrong?
Check that the integration is Activated in Magento and that all four OAuth values were copied correctly into the `MAGENTO_OAUTH_*` variables. Confirm `MAGENTO_BASE_URL` points to the right instance with no typo. If login works but a tool is refused, the integration's API resources under `System > Integrations` probably do not include that permission.
+Write tools such as bulk updates are refused or only return a plan. Is that a bug?
Usually not. Bulk tools use a two-phase flow: a `prepare` call returns a plan to review, then a `commit` call applies it. Guardrails also cap bulk size and warn on large price changes, and Magento ACL blocks anything the integration lacks. Review the plan, and test on staging before granting write resources.
Written Oct 13, 2026 from the vendor documentation. Exact menus, addresses and commands change; the official documentation is the source of truth.