

Installation guide
How to install QuickBooks Online MCP Server
In Claude, ChatGPT, Gemini, Microsoft Copilot, Perplexity, Cursor and Claude Code, with what to check before you start and the first prompts to run.
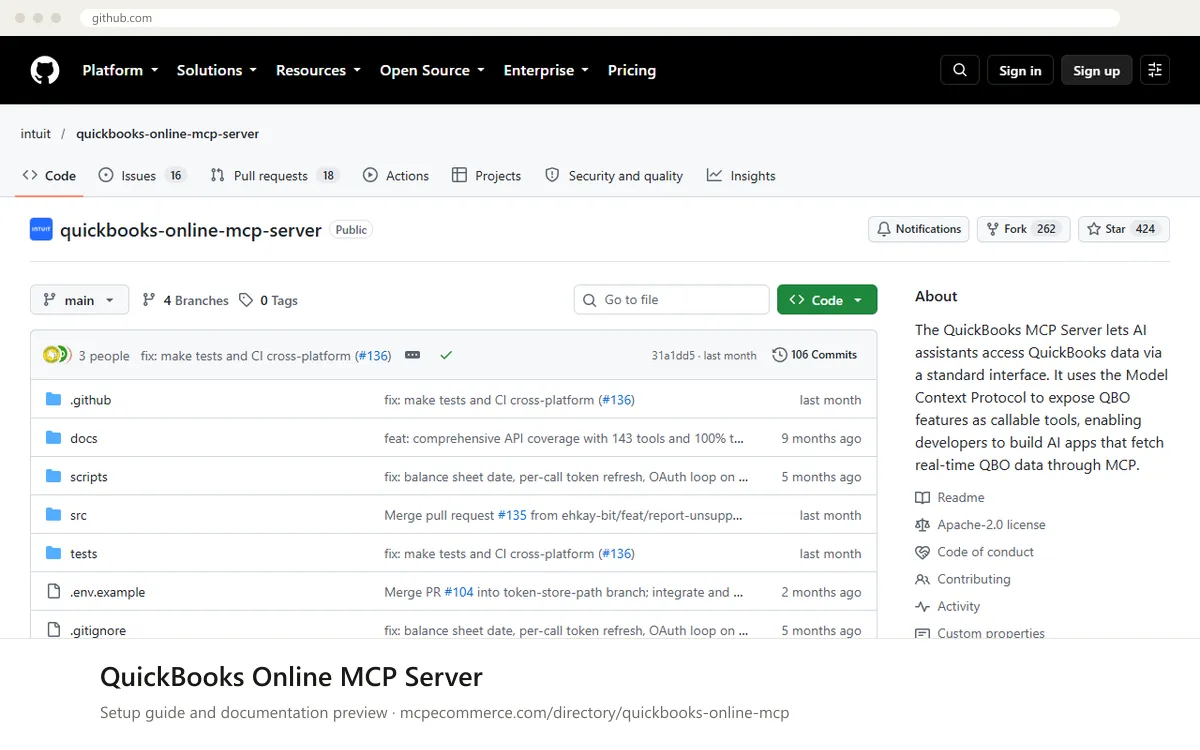
This is a local server. You clone Intuit's repository, build it with `npm`, and your MCP client starts it as a stdio subprocess with `node`. It authenticates to one QuickBooks Online company using the OAuth 2.0 credentials of an app you register on the Intuit Developer Portal, plus a refresh token from a one-time browser handshake. There is no hosted URL to add.
Have a developer who can register Intuit apps and who has access to the target QuickBooks company do the setup. Start with a sandbox company. Writes are enabled by default, so set the three disable flags before connecting any assistant. The listing marks this server as preview, and production needs a public HTTPS OAuth callback for the first authorization.
Before you start
- An Intuit Developer Portal account with an app created (Client ID and Client Secret from Keys & Credentials, Development keys for the sandbox)
- A sandbox company (Sandbox menu in the developer portal) for the first run, and later an admin sign-in to the real QuickBooks company
Node.jswithnpm, andgit, to clone, install and build the repository- The redirect URI
http://localhost:8000/callbackadded in the app under Settings > Redirect URIs for sandbox. For production, a publicHTTPScallback such as an ngrok tunnel - The absolute path to the built
dist/index.jsfile on the machine that runs your MCP client
- How it runs
- Local, runs on your machine
- Access
- Read and write
- Server address
- Copy it from the vendor documentation
 QuickBooks Online MCP Server in Claude
- Complete the shared setup first: register the Intuit app, clone the repository from
https://github.com/intuit/quickbooks-online-mcp-server, runnpm installandnpm run build, copy.env.exampleto.envand fill in the values. - In
.env, setQUICKBOOKS_DISABLE_WRITE=true,QUICKBOOKS_DISABLE_UPDATE=trueandQUICKBOOKS_DISABLE_DELETE=truefor a read-only setup, and setQUICKBOOKS_ENVIRONMENT=sandbox. - Run
npm run authin the repository. Your browser opens, you sign in to the sandbox company, and the tokens are saved to.env. - Open the Claude Desktop config file through
Settings > Developer > Edit Configand add thequickbooksentry from the snippet. Use the absolute path to yourdist/index.js. The docs do not describe Claude Desktop setup in detail, so this uses the standardmcpServersformat with the docs' command and env values. - Fully quit and restart Claude Desktop, then check that the
quickbooksserver is listed with read tools only. - Claude.ai on the web cannot start a local stdio server. Use the Claude Desktop app for this server.
{
"mcpServers": {
"quickbooks": {
"command": "node",
"args": [
"/absolute/path/to/repo/dist/index.js"
],
"env": {
"QUICKBOOKS_CLIENT_ID": "<YOUR_CLIENT_ID>",
"QUICKBOOKS_CLIENT_SECRET": "<YOUR_CLIENT_SECRET>",
"QUICKBOOKS_REFRESH_TOKEN": "<YOUR_REFRESH_TOKEN>",
"QUICKBOOKS_REALM_ID": "<YOUR_REALM_ID>",
"QUICKBOOKS_ENVIRONMENT": "sandbox",
"QUICKBOOKS_DISABLE_WRITE": "true",
"QUICKBOOKS_DISABLE_UPDATE": "true",
"QUICKBOOKS_DISABLE_DELETE": "true"
}
}
}
} QuickBooks Online MCP Server in ChatGPT
- The documentation does not cover ChatGPT. This server runs as a local stdio process and has no public URL.
- ChatGPT connectors in Developer mode add custom MCP servers by remote URL, so they cannot start
node dist/index.jsdirectly. - Do not expose the server publicly just to reach ChatGPT. It holds OAuth credentials for a financial system and the docs describe no remote hosting.
- Use a client that can run a local command instead, such as Claude Code, Cursor or Claude Desktop.
- If you need ChatGPT access, check the vendor repository for any remote or hosted option before building your own wrapper.
 QuickBooks Online MCP Server in Gemini
- Complete the shared setup first: register the Intuit app, clone the repository, run
npm installandnpm run build, and fill in.env. - Set the three
QUICKBOOKS_DISABLE_*flags totrueand runnpm run authagainst a sandbox company. - The docs do not cover Gemini. For Gemini CLI, open its
settings.jsonand add the entry undermcpServersusing the standard command format. - Use
nodeas the command and the absolute path todist/index.jsas the argument. Pass the same env values as in the docs' Claude Code example. - Restart Gemini CLI and list the MCP servers to confirm
quickbooksloads. Gemini app extensions are not covered by the docs.
{
"mcpServers": {
"quickbooks": {
"command": "node",
"args": [
"/absolute/path/to/repo/dist/index.js"
],
"env": {
"QUICKBOOKS_CLIENT_ID": "<YOUR_CLIENT_ID>",
"QUICKBOOKS_CLIENT_SECRET": "<YOUR_CLIENT_SECRET>",
"QUICKBOOKS_REFRESH_TOKEN": "<YOUR_REFRESH_TOKEN>",
"QUICKBOOKS_REALM_ID": "<YOUR_REALM_ID>",
"QUICKBOOKS_ENVIRONMENT": "sandbox",
"QUICKBOOKS_DISABLE_WRITE": "true",
"QUICKBOOKS_DISABLE_UPDATE": "true",
"QUICKBOOKS_DISABLE_DELETE": "true"
}
}
}
} QuickBooks Online MCP Server in Microsoft Copilot
- The documentation does not cover Microsoft Copilot. Copilot Studio adds MCP tools by remote URL, so it cannot run this local stdio server.
- For GitHub Copilot in VS Code, finish the shared setup first: Intuit app,
npm install,npm run build,.env, the threeQUICKBOOKS_DISABLE_*flags set totrue, andnpm run authon a sandbox company. - Create or open
.vscode/mcp.jsonin your workspace. VS Code uses a top-levelserversobject. - Add a
quickbooksentry that runsnodewith the absolute path todist/index.js, and pass the env values from the docs' example. - Save the file, start the server from the MCP controls in VS Code, and confirm it lists tools in Copilot Chat agent mode.
{
"servers": {
"quickbooks": {
"command": "node",
"args": [
"/absolute/path/to/repo/dist/index.js"
],
"env": {
"QUICKBOOKS_CLIENT_ID": "<YOUR_CLIENT_ID>",
"QUICKBOOKS_CLIENT_SECRET": "<YOUR_CLIENT_SECRET>",
"QUICKBOOKS_REFRESH_TOKEN": "<YOUR_REFRESH_TOKEN>",
"QUICKBOOKS_REALM_ID": "<YOUR_REALM_ID>",
"QUICKBOOKS_ENVIRONMENT": "sandbox",
"QUICKBOOKS_DISABLE_WRITE": "true",
"QUICKBOOKS_DISABLE_UPDATE": "true",
"QUICKBOOKS_DISABLE_DELETE": "true"
}
}
}
} QuickBooks Online MCP Server in Perplexity
- The documentation does not cover Perplexity.
- Perplexity desktop app connectors are set up in the app's connector settings. Check whether your version supports adding a local command-based MCP server.
- If it does, enter
nodeas the command and the absolute path to your builtdist/index.jsas the argument. Add the env values from the docs' example, with the threeQUICKBOOKS_DISABLE_*flags set totrue. - If it only accepts a remote URL, this server cannot be added there because it has no hosted endpoint.
- Complete
npm run authagainst a sandbox company before you try to connect.
 QuickBooks Online MCP Server in Cursor
- Complete the shared setup first: register the Intuit app, clone the repository, run
npm installandnpm run build, and fill in.env. - Set the three
QUICKBOOKS_DISABLE_*flags totrueand runnpm run authagainst a sandbox company. - Open Cursor's MCP settings (
Settings > MCP) or edit~/.cursor/mcp.jsonfor all projects, or.cursor/mcp.jsonin one project. The docs do not cover Cursor, so this uses the standardmcpServersformat. - Add the
quickbooksentry from the snippet with the absolute path todist/index.js. - Reload Cursor and check that the server shows as enabled with its read tools.
{
  "mcpServers": {
    "quickbooks": {
      "command": "node",
      "args": [
        "/absolute/path/to/repo/dist/index.js"
      ],
      "env": {
        "QUICKBOOKS_CLIENT_ID": "<YOUR_CLIENT_ID>",
        "QUICKBOOKS_CLIENT_SECRET": "<YOUR_CLIENT_SECRET>",
        "QUICKBOOKS_REFRESH_TOKEN": "<YOUR_REFRESH_TOKEN>",
        "QUICKBOOKS_REALM_ID": "<YOUR_REALM_ID>",
        "QUICKBOOKS_ENVIRONMENT": "sandbox",
        "QUICKBOOKS_DISABLE_WRITE": "true",
        "QUICKBOOKS_DISABLE_UPDATE": "true",
        "QUICKBOOKS_DISABLE_DELETE": "true"
      }
    }
  }
}
QuickBooks Online MCP Server in Claude Code
- Clone the repository from
https://github.com/intuit/quickbooks-online-mcp-server, then runnpm installandnpm run build. - Copy
.env.exampleto.envand fill inQUICKBOOKS_CLIENT_ID,QUICKBOOKS_CLIENT_SECRET,QUICKBOOKS_ENVIRONMENT=sandbox,QUICKBOOKS_REFRESH_TOKENandQUICKBOOKS_REALM_ID. - Set
QUICKBOOKS_DISABLE_WRITE=true,QUICKBOOKS_DISABLE_UPDATE=trueandQUICKBOOKS_DISABLE_DELETE=truein.env. The server resolves.envrelative to the compiled module, so it picks these up when started this way. - Run
npm run auth. Your browser opens, you sign in to the sandbox company, and the tokens are saved to.env. - Register the server with the command in the snippet, using the absolute path to
dist/index.js. The docs' own example is anmcpServersJSONblock with anenvsection, which also works. - Run
claude mcp listin the terminal, or/mcpinside Claude Code, to confirmquickbooksis connected.
claude mcp add quickbooks -- node /absolute/path/to/repo/dist/index.jsCheck that it works
Start with questions that only read data. If these answer from your real account, the connection is good.
- Get the company info for the connected QuickBooks company.
- Run a profit and loss report for last month and summarize income and expenses.
- Search for the five most recent invoices and list customer, date and total. Do not change anything.
Troubleshooting
+The OAuth handshake fails or my production redirect URI is rejected. What now?
Intuit rejects `http://localhost` redirect URIs in production. The docs suggest an ngrok tunnel (`ngrok http 8000`) or a small public callback handler. The registered URI must match exactly in protocol, host, port and path. For sandbox, register `http://localhost:8000/callback` and run `npm run auth` again.
+The server starts but credentials look missing, or it refuses to start. Why?
The server resolves `.env` relative to the compiled module, not your shell directory, so use current `main`. If you set `QUICKBOOKS_TOKEN_STORE_PATH`, it must be absolute and set in the host process env, not in `.env`. When it is set, the package's own `.env` is not read at all.
+I cannot see create, update or delete tools. Is something broken?
Probably not. `QUICKBOOKS_DISABLE_WRITE`, `QUICKBOOKS_DISABLE_UPDATE` and `QUICKBOOKS_DISABLE_DELETE` set to `true` stop `create_*`, `update_*` and `delete_*` tools from being registered. Read tools (`get_*`, `search_*`) always stay. Only enable writes for supervised tasks, on a sandbox company first, then restart the client.
Written Oct 13, 2026 from the vendor documentation. Exact menus, addresses and commands change; the official documentation is the source of truth.