

Installation guide
How to install Shopify Customer Account MCP
In Claude, ChatGPT, Gemini, Microsoft Copilot, Perplexity, Cursor and Claude Code, with what to check before you start and the first prompts to run.
Shopify's Customer Accounts MCP server is hosted by Shopify and acts on behalf of one signed-in customer. There is no single shared URL and no one-click connector. The endpoint is discovered per store from `https://<shopDomain>/.well-known/customer-account-api` (the `mcp_api` field), and every request needs an OAuth 2.0 access token obtained through the authorization code flow with PKCE. The vendor documentation describes this as something your app implements, not something you paste into a chat client.
This is a job for an agency developer or the app developer, working with a store owner or staff member who can manage the store domain and Shopify Partners access. Start on a dev store with test customers only. The server handles personal data (name, email, phone, address, orders), so review the authorization flow and the tools returned by `tools/list` before any real customer uses it.
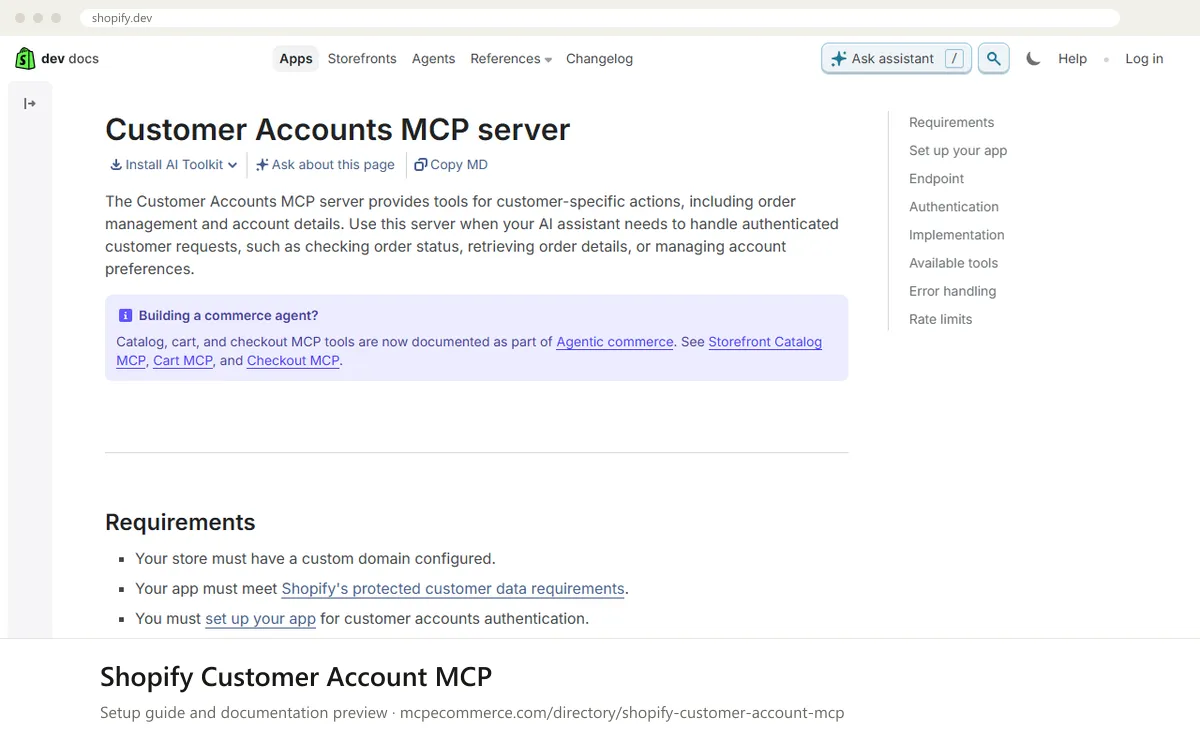
Before you start
- A Shopify store with a custom domain configured (a documented requirement), plus a dev store with sample products and a test customer for first runs.
- A Shopify app that meets Shopify's protected customer data requirements and is set up for customer accounts authentication.
- Shopify CLI installed, and access to the Shopify Partners dashboard (Dev Dashboard apps) to request protected customer data access.
- A registered redirect URI for your app, listed under
[customer_authentication]inshopify.app.toml. - An MCP client or your own agent code that can send an
Authorizationheader and handle a 401 response by starting the OAuth flow.
- How it runs
- Remote, added by URL
- Access
- Varies by tool
- Server address
- Copy it from the vendor documentation
 Shopify Customer Account MCP in Claude
- The Shopify documentation does not cover Claude.ai or Claude Desktop. Treat the steps below as the generic custom connector route and confirm it works with this server before relying on it.
- Complete the app setup first: scaffold the app with Shopify CLI (or run
shopify app config link), request Protected customer data access under API access requests, and addscopesandredirect_uristoshopify.app.toml. - Discover the MCP URL for your store from
https://<shopDomain>/.well-known/customer-account-apiand read themcp_apivalue. - In
Settings > Connectors, add a custom connector and enter that discovered URL. - The server requires a per-customer OAuth token from the
PKCEflow with thecustomer-account-mcp-api:fullscope. If the client cannot complete that flow against your app, use it only through your own agent code. - Test with a dev store customer, not a real one.
 Shopify Customer Account MCP in ChatGPT
- The Shopify documentation does not cover ChatGPT. The generic route is to enable Developer mode for connectors and add a custom MCP server by URL.
- Finish the Shopify app setup first: protected customer data access,
scopesandredirect_urisinshopify.app.toml, and the app installed on a dev store. - Read the
mcp_apivalue fromhttps://<shopDomain>/.well-known/customer-account-apito get the exact MCP URL for the store. - Add that URL as a custom connector. Whether ChatGPT can complete the required
PKCEtoken exchange for this server is not documented by Shopify, so verify before use. - If sign-in does not work, call the server from your own agent code that implements the OAuth flow instead.
- Use a dev store and a test customer only.
 Shopify Customer Account MCP in Gemini
- The Shopify documentation does not cover Gemini CLI or Gemini app extensions. The standard route in Gemini CLI is an entry under
mcpServersin the settings file. - Complete the Shopify app setup first, including protected customer data access and
shopify.app.tomlchanges. - Get the store's MCP URL from the
mcp_apifield athttps://<shopDomain>/.well-known/customer-account-api. - Obtain an access token by running the
PKCEauthorization code flow described in the Shopify docs, using the endpoints fromhttps://<shopDomain>/.well-known/openid-configuration. - Add a remote server entry in
mcpServerswith the discovered URL and anAuthorizationheader holding the token. Check the Gemini CLI docs for the exact key names. - Restart Gemini CLI and test with a dev store customer.
 Shopify Customer Account MCP in Microsoft Copilot
- The Shopify documentation does not cover Copilot Studio or GitHub Copilot in VS Code. Use each product's standard way of adding a remote MCP server.
- Complete the Shopify app setup first: protected customer data approval,
scopesandredirect_urisinshopify.app.toml, and the app installed on a dev store. - Read the store's MCP URL from the
mcp_apifield athttps://<shopDomain>/.well-known/customer-account-api. - In VS Code, add a remote server by URL in
.vscode/mcp.json. In Copilot Studio, add an MCP tool or custom connector with the same URL. - Supply the OAuth 2.0 access token from the
PKCEflow as theAuthorizationheader or through the product's OAuth settings. Shopify does not document either approach, so confirm it works. - Run only read-only prompts against a test customer at first.
 Shopify Customer Account MCP in Perplexity
- The Shopify documentation does not cover Perplexity. The generic route is to add a custom connector by URL in the desktop app's connector settings, if your plan offers it.
- Complete the Shopify app setup first, including protected customer data access and the
shopify.app.tomlscopes and redirect URIs. - Read the
mcp_apivalue fromhttps://<shopDomain>/.well-known/customer-account-apifor the store's MCP URL. - Add that URL as a custom connector in the Perplexity desktop app.
- Shopify requires a per-customer OAuth token from the
PKCEflow. Whether Perplexity can complete it is not documented, so test with a dev store customer before any wider use. - If it cannot authenticate, call the server from your own agent code instead.
 Shopify Customer Account MCP in Cursor
- The Shopify documentation does not cover Cursor. The standard route is a remote entry with a
urlin Cursor's MCP settings ormcp.json. - Complete the Shopify app setup first: protected customer data access,
scopesandredirect_urisinshopify.app.toml, and the app installed on a dev store. - Get the store's MCP URL from the
mcp_apifield athttps://<shopDomain>/.well-known/customer-account-api. - Run the authorization code flow with
PKCE(scopecustomer-account-mcp-api:full) to get an access token for a test customer. - Open Cursor's MCP settings, add a server with the discovered
url, and pass the token in anAuthorizationheader. Check Cursor's docs for the header key format. - Reload Cursor and confirm the server lists its tools.
Shopify Customer Account MCP in Claude Code
- The Shopify documentation does not cover Claude Code. The standard route is
claude mcp add --transport http <name> <url>, with header options as described in the Claude Code docs. - Complete the Shopify app setup first, including protected customer data access and the
shopify.app.tomlscopes and redirect URIs. - Read the
mcp_apivalue fromhttps://<shopDomain>/.well-known/customer-account-apito get the store's MCP URL. - Get an access token for a test customer through the
PKCEflow, using the endpoints fromhttps://<shopDomain>/.well-known/openid-configuration. - Add the server with the discovered URL and the
Authorizationheader set to the token. Take the exact header flag from the Claude Code documentation. - Run
claude mcp listto confirm the server is registered, then ask it to list its tools.
Check that it works
Start with questions that only read data. If these answer from your real account, the connection is good.
- List the tools this Customer Accounts MCP server exposes and summarize what each one can read or change.
- For the signed-in test customer, show the status of their most recent order.
- For the signed-in test customer, show the account details on file, without changing anything.
Troubleshooting
+The server returns 401 Unauthorized. What now?
A 401 means the request has no valid access token. Your app must start the OAuth flow: read `authorization_endpoint` and `token_endpoint` from `/.well-known/openid-configuration`, run the authorization code flow with PKCE, then retry with the token. Check that `redirect_uri` matches the one in `shopify.app.toml`.
+The discovery endpoint fails or I cannot find the MCP URL.
The MCP URL is not fixed. It comes from the `mcp_api` field at `https://<shopDomain>/.well-known/customer-account-api` on the store's storefront domain. Shopify lists a custom domain as a requirement, so confirm the store has one configured and that you are using that domain, not a placeholder.
+Tools are missing or customer data requests are refused. Why?
Check that Protected customer data access was requested and approved for name, email, phone and address. Also check that the `scopes` in `shopify.app.toml` include the customer scopes you need and that the app was deployed and installed on the store. Use `tools/list` to see which tools your token can use.
Written Oct 13, 2026 from the vendor documentation. Exact menus, addresses and commands change; the official documentation is the source of truth.